Sunday, January 11, 2015

Cinnamon Bing

Have you heard that bing is the newest hippest thing?  Not the search engine (sorry hon, that still isn’t cool), but rather the bread.  I read it somewhere, I think in Bon Appetite, so it must be true.  Alas, living where we do means that we don’t have a lot of the ethnic bakeries around, so no authentic bing for me.  Back to the drawing board of making your own. 

Anyway, bing is a round Chinese bread, layered with endless options of fillings (potatoes, scallions, red beans) and then usually pan fried, but can be baked as well.  I got a hankering for some sesame scallion bread (Zhi Ma Da Bing) the other day to go with our miso ramen soup, (because you know, twice the carbs is better than one) so I tracked down a couple recipes to go from.  I’m pretty confident in my bread making ability – give me a range of ingredients and what the texture of the dough should be like (stiff, soft, sticky, etc) and I can usually hit it.  Honestly, it was easier than I thought. 

After making scallion bread, I wondered about making cinnamon bing.  The best part of a cinnamon roll to me are all the flaky layers wrapped in cinnamon and sugar.  It always bums me out when I end up with just one of the outer layers of a roll.  With a cinnamon bing, you would get all those layers. 

There are a couple cool things about bing bread – first, if you use an oil (and you want to) you get a ton of flaky layers almost as if you had laminated the dough ala croissant style or puff pastry.   Also, the bread doesn’t really have a second proofing and since you can cook it on your stove top, it means that this bread is instant gratification.  The only wait time is the initial proofing.

I have tried making bing both on the stove and in the oven.  The stove is great because both the top and the bottom of the bread gets this browned crispy edge.  Cooking it on the stove does take a little more care the first couple of times – it can brown quickly without cooking the middle.  I still have the maddening cooktop in my new house, and I found that I had to turn the burner down to the very lowest setting and covered the pan with a lid to keep the heat in.   Flipping it can be a bit of a challenge depending on how big the roll is, so you may want a second pair of hands the first time.   If you don’t want to deal with it just pop it in the oven. 
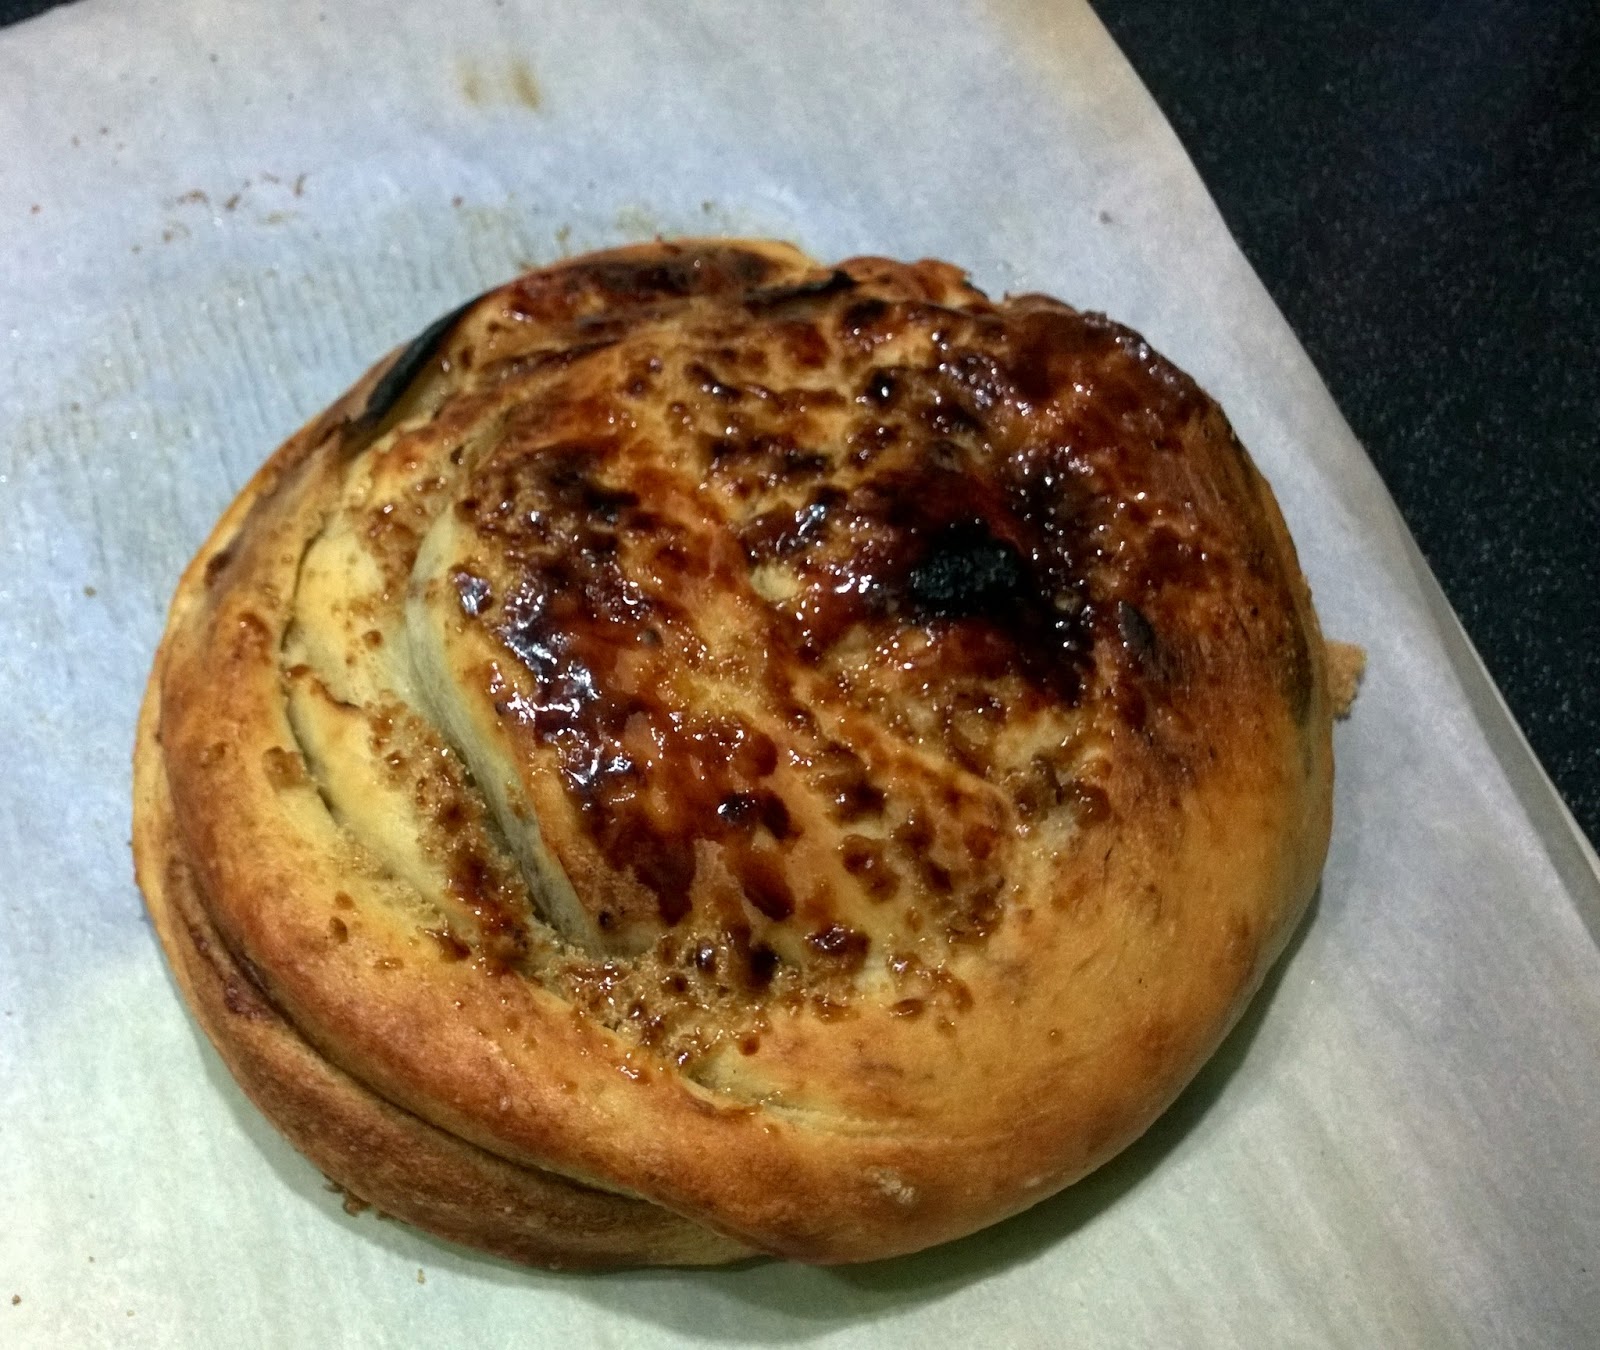
 

Notes on this recipe – I added an egg to this dough, but it is easily omitted.  Add a little more water or a little less flour.  The dough does not have to be an enriched dough, but I like it with this cinnamon recipe.  If you want a more savory bread, like with scallions and sesame seeds, lose the egg and the sugar. 


Cinnamon Bing

Ingredients

 1 envelope Dry yeast (about 21/4 tsp.)
2 tablespoons sugar
1 teaspoon kosher salt
3 cups all-purpose flour (More or less, depending on weather plus more for surface)
1 Egg
1
 cup water (may need a little more or less depending on dough)
1/3 cup Butter melted
1/3 cup Cinnamon - sugar mixture depending on how sweet/cinnamony you want it
Optional:  2 tablespoon Brown sugar for caramelization

Instructions

Dissolve yeast in about 1/2 cup of water to check for viability. Or don't. I know my yeast is good, so I usually skip this step.

Add sugar and egg (if using), salt and about one and a half cups of flour. Stir until well mixed. Gradually continue to add flour until it forms a slightly sticky dough ball. You may need to add less or more - but generally about 3 cups for me. Knead until dough is smooth. Spray with cooking spray, cover and let rise until double, about an hour or so.

How it started (note the paintbrush)
After the dough has risen, clear a large space on your counter, the more the better. I use almost my whole island, but a kitchen table would work too. Sprinkle with flour. Roll out the dough as long and as thin as you can.  You may have to take a couple short breaks to let the gluten loosen up. I estimate that my dough is usually about 1/8 of an inch thick, 3-4 inches wide and about 3-4 feet long. (see pictures).
 
How it ended up


Once you get it as long and as thin as you can without falling on the floor, running out of space or tearing. Brush with melted butter and sprinkle with cinnamon and sugar. Fold the layer over long-ways, pressing lightly so it will stick. You will still have a long piece of dough.
 
Repeat the butter and cinnamon/sugar mixture, and fold over again, pressing lightly. You have a long piece of dough with two layers of butter and cinnamon/sugar in it. Brush the top layer with butter again.
 

On a piece of parchment paper, start to roll the dough like a snail. You want a big, flat, round coil. Press down on the coil to make sure all the layers adhere to each other. It should be flattened. Brush disk with butter.
 

To pan-cook - Make sure the disk is flat! Place unbuttered side in a buttered or sprayed non stick pan that has a lid on low.. I had mine down to the lowest notch on my stove. Cover with the lid. Cook for about 2-3 minutes and check the bread - you don't want it to burn! Once the bread starts to turn a golden brown (about 5 minutes on my stove?) flip the bread. The lid is important - it keeps in the heat - don't try to cook this without a lid. You'll have beautiful golden bread with an uncooked interior.

To bake: Bake at 375 for about 20-25 minutes or until golden brown.


Added bonus: My favorite way to make this bing is to add a caramelized top to the cinnamon bread - sprinkle some brown sugar in your pan or I just use some brown sugar and my blow torch due get a beautiful caramelized top.

Saturday, January 3, 2015

Taquitos


When I was a kid, I used to love getting flautas from the Mexican restaurant down the street.  Corn tortillas, stuffed with meat, wrapped into little cigarette-type rolls, deep fried, usually served with guacamole.  So good.   

After we got married, the husband and I got hooked on the ease of taquitos.  Basically the same thing, but not fried up to order.  Straight from the freezer to the oven.  Taquitos and potstickers became the basis of the infamous “Crap Dinner” we would indulge in about once a month.  Just like it sounds, this meal is rooted in junk food and usually resulted in two days of drinking water to account for the amount of sodium we had ingested.

Taquitos are still one of our favorite easy dinners.  I’ve gotten more and more disappointed in the taquitos that you can buy in the store, especially as I constantly consider the ingredients vs. homemade and the cost of prepared foods vs. making it at home.  I still do a ton of crock pot and make ahead meals due to Little E’s crazy riding schedule.  I was reading Jessica Fisher’s Not Your Mother’s Make-ahead and Freeze cookbook from the library the other day and was inspired by her frozen taquitos recipe.  I hadn’t considered making them at home. 

I hesitate to even claim that I have a recipe for taquitos because I tend to use it as a Use-Up-The-Leftovers food now.  Leftover roasts, chicken, and such all go into the freezer until I have enough to make taquitos although occasionally, I’ll make something specifically for taquitos – like a venison roast.  Drier veggies make good additions – corn, peppers, potatoes, rehydrated or oil cured dried tomatoes.   Cilantro holds up well too.  The only thing we have not really cared for has been cheese – the cheese doesn’t hold up well and melts away long before the frozen taquitos are done.  I just tried some with feta, and it held up a little better, but generally not worth the calories, as far as I was concerned.   In terms of seasonings, again, you don’t want your filling to be too moist – the tortilla will get too wet on reheating and fall apart.  That said, a little barbeque sauce or adobo sauce adds a lot of flavor.

Because frying all the tortillas takes some time and makes the house a little smelly, this is not something I make unless I’m willing to commit the time and energy to make a big batch.  I rarely make just one filling.    I’d say altogether it probably takes me an hour to an hour and a half to make 60+ taquitos (that's two small bags of tortillas), depending on how organized I am.   And just in case you were thinking about skipping the whole frying step – don’t even consider it.  Corn tortillas are difficult to work with, and the pre-frying step will make sure they cook up properly once frozen. 


 Make-Ahead Taquitos with Filling Ideas 
Yields: 8+ Servings

Ingredients
1 cup Oil May need more depending on pan. Not olive oil - you want something with a high heat point
2 bags Corn Tortillas
-- FILLINGS --
-- BBQ Pork --
1 1/2 cup Leftover carnita/roast pork
1/4 cup Finely chopped onions
1 tblspoons Cilantro
1/4 cup Bbq sauce Enough to moisten
-- POTATO CHORIZO --
2 Potatoes
1 Sweet potato
2/3 cup Fresh chorizo (can use Spanish chorizo, use about 1/2 cup, finely diced)
1/2 cup Feta Cheese (if desired)
-- CHICKEN AND BLACK BEAN--
2 cups Cooked, shredded/chopped chicken
1 can (12 oz) Black Beans
1/4 cup Salsa Use just enough to moisten filling - don't want filling to be wet
2/3 cup Frozen corn
-- BEEF or VENISON AND GREEN CHILI --
2 cups Roast Beef or Roast Venison
1 can (small) Green chili
1/2 cup Finely chopped onions
1/2 cup Frozen corn (optional)
Instructions
Prepare desired fillings by mixing ingredients together. If using a sauce (like bbq or salsa), use just enough to make the filling moist, but not wet. Season with salt/pepper/garlic as desired.

Prepare tortillas - using a large skillet, heat about an inch of oil to shimmering. Fry tortillas, 1-2 at a time for about 10-15 seconds on each side. Tortillas should not brown at all. Do not skip this step. Drain on paper towels.

Once tortillas are cool, spread about 2 tablespoons of filling on one edge of a tortilla. Roll up tightly, like a cigarette. Secure with a toothpick. Repeat. (I usually can get 2-3 on a toothpick). Lay out on a cookie sheet to freeze (if you are good, you'll remember to take the toothpicks out when the taquitos are slightly frozen but still flexible enough to remove the toothpick. Otherwise, you can just leave them in and even cook them with them in). Once frozen, package off into smaller bags or vacuum seal.


Monday, December 29, 2014

Pasta Maker with Quick Red Sauce

My husband got me a beautiful set of Shun knives for Christmas.  Beautiful and so very sharp.  In fact, I sliced the couch accidentally while I was unwrapping them and putting them away (I may not ever hear the end of that). 

With that purchase, he got a credit back to Williams-Sonoma.  Add in the gift card I received, and we had a handy little amount to spend.  I don’t usually shop there – it’s very expensive, but I do love to walk through it. 

I had my eye on some attachments for my KitchenAid mixer – I don’t have a single attachment, and I thought it might be fun to get a pasta maker attachment.  I have a hand crank pasta maker, but it’s a pain in the ass.  I’m willing to spend a lot of time of weird cooking stuff (obsession with springerle?) but pasta – ugh.  The constant kneading and rolling and re-rolling and re-rolling before you can even cut it… And then the cleaning and picking out little bits of dried pasta for the next two weeks. It’s too much for me. 

Anyway, the lady at W-S really spoke highly of the Philips Pasta Maker as opposed the KitchenAid attachment.  I have never heard anyone gush over a product like this.   And when I did a quick check online, just about all the other reviews of it also gushed over it. 

It’s a pretty cool machine – just put in your ingredients and in 15 minutes, you have fresh pasta.  My one complaint is that it only has 4 shaping discs – spaghetti, fettuccini, penne rigate and lasagna (which can be used to make ravioli and dumplings).  Apparently, if you live in Australia or Asia, you can get udon, ramen, angel hair and a tagliatelle.  The recipe book that comes with it includes recipes for the other discs.  It’s pretty cruel, as far as I’m concerned.  I’m still considering whether it’s worth the $60 shipping fee to get a $20 part.  

Now… the fun part….  My husband arranged for an impromptu dinner party with a couple friends.  I know you aren’t supposed to try something new like this when having a party, but I figured it would be fun for everyone.   Six adults, five kids – we’d see how this thing would work.  I made a quick red sauce and a quick white sauce (wasn’t sure what the kids would eat) and grilled some sausages and a chicken breast for protein.  Bob (my starter) provided another loaf of bread and my girlfriend brought a salad.  Didn’t have time to make dessert, but we still had plenty of Christmas cookies. 

Oh. My. God.  I doubt I will ever buy pasta again.  It was perfect.  Delicious.  And done in 10 minutes.  We made two large batches of spaghetti and it was probably a little tight – I could have made a third small batch.  And I say this primarily because I woke up this morning wondering if there was any pasta left because I really really wanted some for breakfast.  But alas, we ate it all last night.

 And the topper on the thing – it was a breeze to clean.  Even I could take it apart and clean it.  No teensy tiny parts to lose.  Fantastic.

Tonight, I am going to try Food52’s Spicy Ramen Express Recipe with Harold McGee’s Alkaline Noodles (although I may cut the semolina with a bit of AP flour).  

 
Last Minute Red Sauce

Ingredients
1 large Onion Very finely diced/processed
3 tablespoon Butter
1 can (8 oz) Tomato Paste
1 can (12 oz) Tomato Sauce
1 large can Tomatoes drained
1 small can Tomatoes drained
1/2 cup Wine/water can use red or white
1 tablespoon Spices (Basil, Bay, Oregeno, parsley)
4 cloves Garlic crushed
to taste Sugar Usually pinch to 2 tbls
1/4 cup Shredded italian cheese (parmesan or a mix)
2 tablespoon Butter

 
Instructions
Saute onion in butter until very soft. Add tomato paste, tomato sauce, both jars/cans of tomatoes and wine. Break up tomatoes if whole. Add in spices if dried to taste. Let simmer for 20 minutes. If using bay leaves, take them out now. Taste sauce - may need a little sugar, depending on wine used and tomatoes and how sweet you like it. This is also the point to adjust texture - if you like your sauce smooth, stick an immersion blender in it.  Otherwise, leave it chunky.  Stir in garlic and cheese. Let simmer for as long as you need. Shortly before serving, taste again, adjust spices. Finally, stir in the last two tablespoons of butter, mix well into sauce.


Yields: 6-8 Servings


Saturday, January 25, 2014

Coffee Berries.....

About 6 years ago, I thought it would be fun to purchase some coffee plants.  We both love coffee, like, seriously like coffee.  Coffee has become one of our hobbies.  A friend from the neighborhood shared that she had a coffee roaster and it opened up a huge realm of possibilities.  We now have a coffee roaster, pounds of green beans, a big fancy grinder and of course, the coffee plants.

So, I got these plants.  I think I ordered two of them, but really, I got like 12 little sprigs of plants.  They were nice foliage and I have a great sunroom (when the oak trees don't shade it) so they were able to stay completely climate controlled.  Over these last six years they have grown tremendously and the plants now occupy three large 25 gallon pots.

Last May, we got our first blooms.

 
Pretty little things, aren't they?  The scent was sweet, really sweet.  Not as pervasive as a lemon tree (which I also have), but it could have been because there are fewer blooms.  We had a few fruits set.  I wasn't looking for a lot, because I didn't want to tax the plant, but I couldn't help but get excited when we had a solid 20-30 berries set across about 3 of the plants.

Fast forward seven months.  It's JANUARY.  STILL NOTHING.  These green berries done nothing for seven months.  I was starting to think they were never going to ripen.  I figured that the inside of a house in the frigid north was just not going to do it.

And then....

We have ripening.....  About January 10th I noticed the first signs of something changing.  At first I thought it was the berries dying (they were yellowing slightly).  But no - they were changing to red!


So today, I actually picked a berry.  At least one of them had that firm but squishy feeling that I associate with ripe fruit. 

Inside the berry, I was rewarded with two green beans!


So, I'm off to figure out how to process the beans.  The green beans have a coating on them - I associate it kind of like tomato seeds - it's kind of firm and slippery.  I believe I need to get that coating off.  I know with tomato seeds you ferment the seeds to remove the coating.  We may have enough to get a half of a cup of coffee, but it's been fun!  And, it's one step closer to knowing where our food comes from and being able to sustain my coffee habit in case of the zombie apocalypse.


Saturday, January 21, 2012

Krispy Pops

Miss Thing has a July birthday.  While there are many benefits to having a summer birthday, there are a few fallbacks as well.  For those with a summer birthday, there is not the same excitement of having the whole class sing happy birthday, of the special birthday treat, of having that "special day" with the entire school. 

Fortuntely for those with a summer birthday, it means that you have a winter half birthday.  Now, I admit that I have not always been the most diligent mom when it comes to half birthdays.  I'm pretty sure I remembered last year to bring something in.  But I think that was my first time.

This year, Miss Thing requested that she can bring in a treat, so how could I refuse?  Her classroom is a restricted one - no nuts, no eggs.  I've been using my "crazy cake" recipe (no eggs, no dairy) cake for so long for her school events that I'm getting tired of making it.  Let alone I have dug myself into a bit of a hole with the complex constructions of some of my previous cakes.

So this year, it was something simple.  Rice crispy treats.  Sticks.  Chocolate.  Sprinkles. 


Start with your basic rice crispy treat.  I try and pack them down a bit as well.  You want some strength to your treat.  Then, spread a thin coat of chocolate on the back for structure and strength.  Homemade rice crispy treats can get a little flaccid or bendable at times.  You do not want that in a pop.


 Now, about that stick....  Rice crispy treats are not exactly the most stable, and while a stick should stay in, it is best to apply reinforcements.  Before placing that stick in the rice crispy treat, go ahead and dip it in chocolate first.  That way, the stick will be cemented inside the treat.


Drizzle the other side with more chocolate and top with sprinkles.   A sugar filled treat fit for a princess.  On a stick.  


Wednesday, January 18, 2012

Crack pie

I'm in denial.  I'm pretty sure if I ignore the date of my last post, I won't feel like quite as much of a loser.

Now, back to the food. 

I'm a little behind the times with Crack Pie.  It's been talked about in so many places (just to begin).  I remember seeing the first recipe show up in Bon Appetit in 2010 from Momfuku Milk Bar's pastry chef Christina Tosi and was intrigued, but not overwhelmed with the desire to make it.  I'm more of a chocolate girl myself, and well, this didn't have chocolate in it, and really didn't seem like it needed chocolate.  If you aren't familiar with this dessert, it's described as a salty/sweet oatmeal cookie crust with a gooey buttery center.

However this past weekend, my brother-in-law was bringing his new girlfriend over and I thought it might be nice to have a little dessert to break the ice.  I wanted to do something different.  With kids around brownies tend to be go-to sweet bite, but it gets boring.  A friend had recently posted her success with crack pie, so I figured I'd give it a go as well.

My one concern about the recipe was the sweetness.  I read a lot of reviews discussing how overpoweringly sweet the pie is.  And as much as I try to follow a recipe exactly the first time, looking at the crust, I knew that I didn't have time to bake a cookie just to make a cookie crust.  However, I have a good pat-in-the-pan oatmeal cookie crust that looked remarkably similar (it's the same crust I use for caramel cashew bars).
We let it cool and decided that I couldn't wait until brother-in-law and said girlfriend came over.  We decided that we would just sliver one of the two tarts.  Just to see how it tasted.  We would still have one full and pretty tart to cut into, and no one would be the wiser.

Before the guests got here, we had finished the whole tart.  One tiny sliver at a time.

The irony is that the new girlfriend (in whose honor I made the tart) didn't want any due to a diet.

Crack Pie (with an adapted crust)
Crust:
  • 1 cup old-fashioned rolled oats
  • 1 cup all-purpose flour
  • 1/2 cup packed light brown sugar 
  • 1/4 teaspoon baking soda plus a pinch
  • 1/2 teaspoon salt (plus a pinch)
  • 10 tbls butter (very cold)
Put flour, brown sugar, salt and baking soda in a food processor.  Pulse in butter until mixture resembles coarse meal.  Pour mixture into bowl and work in oats using hands.
Pat crumbs into pan (I used two 5 inch tart pans, but the recipe is designed for a 10 inch pie, so there may be some crumbs left over).
Bake crust at 350 degrees for about 15 minutes or until crust starts to turn golden brown and is set.

NOTE ABOUT CRUST:  This crust may make a little more than a 10 inch pie pan


Filling:
  • 3/4 cup sugar
  • 1/2 cup (packed) light brown sugar
  • 1 tablespoon nonfat dry milk powder
  • 1/4 teaspoon salt
  • 1/2 cup (1 stick) unsalted butter, melted, cooled slightly
  • 6 1/2 tablespoons heavy whipping cream
  • 4 large egg yolks
  • 1 teaspoon vanilla extract
  • Powdered sugar (for dusting)
Position rack in center of oven and preheat to 350°F. Whisk both sugars, milk powder, and salt in medium bowl to blend. Add melted butter and whisk until blended. Add cream, then egg yolks and vanilla and whisk until well blended. Pour filling into crust. Bake pie 30 minutes (filling may begin to bubble). Reduce oven temperature to 325°F. Continue to bake pie until filling is brown in spots and set around edges but center still moves slightly when pie dish is gently shaken, about 20 minutes longer. Cool pie 2 hours in pie dish on rack. Chill uncovered overnight. DO AHEAD Can be made 2 days ahead. Cover; keep chilled.

Friday, June 26, 2009

Napa, and a special dinner...

We just returned from 48 hours in Napa, culminating in a visit to.... *The* French Laundry.

What an experience. Honestly, as wonderful as it was, I feel no burning need to return quickly... It was a very special occasion dinner, with everything cooked perfectly.

I'll write more about the dinner soon, but I'm currently pursuing sauerkraut.

Monday, June 15, 2009

My new favorite squished potatoes...

As a child, we had potatoes with just about every meal. I chalk a lot of this to my paternal grandmother's immigration from Ireland, and her subsequent influence on my father. A meal was not complete without a potato of some kind. I remember my grandmother visiting us, and accompanying our meal of spagetti, we had... potatoes. Her idea of health food was a McDonald's fried fish sandwich and a large order of french fries.

Potatoes have always been a symbol of comfort and stability for me. I could eat them every day, in varying forms. Unfortunately, I can also eat way too many of them - somehow the section of my brain that says "stop eating" turns off when potatoes are around. Like other things that accompanying getting older, I am trying to limit my consumption of starches - not for some Adkins like diet thing, but just an acknowledgement that I can't eat as much of them (or anything) anymore, and I don't feel particularly good when I do.

But there are still days that I crave potatoes. I love french fries (the way my dad used to make them), but fried food is a big no-no. I used to make over roasted french fries, but I always have had problems with them sticking to the pan or foil. It's like the raw potato starch solifies and sticks so you can't turn the potatoes to get them evenly browned. Maybe I'm the only one who ever has this problem.

My inspiration came after reading a recipe for mashed, roasted potatoes. First, boil the potatoes, THEN roast them. Given, you're not going to be able to cut them into those little french-fry strips, if that's what you're craving, but I am in shock and awe of how much better the potatoes turn out.

First, scrub some red-skinned (or other waxy type) potatoes. Boil them in enough water to cover until a fork pierces the potatoes easily. You want the potatoes to be pretty tender because you need to be able to squish them with a fork.

Next, spread them out on a baking sheet lined with aluminum foil, and use a fork to gently squish and break up the potatoes. Now, I like lots of little crunchy pieces, so I break them up quite a bit. Drizzle with olive oil (or a butter/olive oil combo if you're feeling really daring), salt, and maybe garlic if you are so inclined. You want all the pieces to be coated.


You're going to look at the pan (above) and think, 'This is going to turn into a goopy sticky mess' , but I swear, it's not.

Bake at 400 or 450 until the potatoes are as crispy as you like. All those little bits will become like little potato croutons. Because they have been pre-cooked, the insides are fluffy and tender, but the outsides and skins are so crispy.

Serve them with ketchup or aoli, or I even use them in my potato salad now. I also like to serve them as a tapa (potato bravos)...

Saturday, May 30, 2009

Lilacs,

One of the things I loved most about our (last) house in Cbus were the lilacs. I had planted lilacs under every window on the first floor. In spring, the fragrance was intoxicating (and probably overwhelming if you're not into lilacs). It was with great dismay that I realized I would probably never be able to sustain a lilac bush here in Toledo. Too much shade. No place I could really put it to even give it enough sun.

So imagine my delight, when today, my birthday, I discovered that the gangly, overgrown bush by the entrance of the house was indeed, a lilac bush. I'm guessing that the previous owners pruned it back at the incorrect time two years ago, resulting in no blooms last year. This year, there are about 6-7 tufts of lilacs. Clearly, the lack of full sun is influencing the bloom, but hell, I'll take whatever I can get. I sacrificed a few sprigs so I could make the kitchen smell like lilacs.

Wednesday, May 27, 2009

Backyard Gardening...

At the completion of my master gardener training last year, the one piece that I was disappointed in was the small wedge of time that edible gardening (which I will call vegetable, fruit and herb gardening) was allocated. It was about half a day, total, most of which was spent on very, very basic elements of vegetable gardening (starting things from seed, how much light do most vegetables need, etc.). This is not the fault of the program, rather reflective of the large amounts of information and the diverse knowledge of the student population in the master gardener class. I'm sure while I was furiously taking notes on something as foreign to me like, roses, the master rose lady was picking the dirt from her fingernails.

However, I was so excited when I saw an opportunity to specialize in that which I adore the most. Tomorrow, I start the Backyard and Local Foods specialization, which is being offered at a statewide level. It's an 18 month program, where we meet once a month. I'm eager and excited to really learn in a more academic setting about the gardening that I tend to fumble through each year.

Friday, May 22, 2009

I'm a consultant, dammit.

I thought I should provide a brief update on my employment situation.

When I started this, I had no job, and, well, to be honest, no real prospects at the time. Not to mention, when one comes off of a PhD program, you may not even feel like doing anything remotely like what you just spent the last six years doing. This is complicated by living in what is basically a dying town. Each week I hear of another friend who has lost their job, or is nervously awaiting the next round of layoffs. Not only is this disheartening, but it leaves me little hope of someone desperate for an employee with solid structural equation modeling experience.

However, as we are nearing the two year point in our new situation, I am happy to say that the years of education have not gone to waste. I am an adjunct professor and I am doing some consultant work that has made me very happy. I get to feel like I have a hand in things, and when people ask me what I do, I don't have to say "unemployed" or "stay-at-home mom." Instead, I'm write down "consultant" for every line asking for employment.

I have found the consulting work to be quite fufilling and challenging enough that I feel like I am a useful part of a team. I am also optimistic that my continued experiences will only lead to more of these opportunities. In my adjunct world, I've been working on committees this quarter, and have found it absolutely fascinating to look at the comprehensive exam and dissertation experience from the other side.

So there is life, after dissertation and after mourning the tenure track.

Thursday, May 14, 2009

Peanut Butter

I have been making peanut butter at home for about three years now. After Whole Foods came into our neighborhood, we fell in love with the fresh ground honey roasted peanut butter that you pay an arm and a leg for but grind it right there in the store.

It didn't take long for us to try it at home. The result was just beautiful. Slightly bumpy (a food processor can't get grind it completely smooth), fresh smelling, never separating into that oily goop like the natural stuff you buy in the store, and slightly sweetened because we still use the honey roasted peanuts.

When I mention that I make my own peanut butter, people get that glazed look on their face. You know that look: The "Oh. You're one of THOSE weirdos who sew their own clothes and raise their own chickens and don't use deodorant and sing songs around a guitar instead of watching Make Me a Supermodel like the rest of us" look. Well, I would raise my own chickens if I could, but I'm really liking Salome and the hot guy from England and I hope one of them takes it all.

The thing is, it is so.damn.easy and cheap for that matter, it doesn't make sense not to make it anymore. It lasts forever and it tastes so much better! And it takes approximately 8 minutes to make. I timed it.

So, I'm sharing my peanut butter strategy with all of you. I encourage you to run out right now and try it.

First, get yourself a big ole can of honey roasted peanuts. You can use plain roasted peanuts, but DO NOT use dry roasted. I'm not sure why, but they are not as oily and do not develop the butter texture. No matter how long I ground them, I ended up with just crumbly peanuts. I now go to one of those wholesale stores and just buy a case of the huge tubs of peanuts so we don't have to worry about running out.

Add those peanuts to your food processor, about 1/2 to 3/4 the way up the bowl.

Next, start the processing/chopping of those peanuts. At first, your peanuts will look like, well, chopped peanuts.

pb1


Keep the processor running. At the next stage, your peanuts will start to clump together. They are starting to extrude oil, and you'll notice that there are little clumps at the bottom of the processor, and it may even clump around the top. This is a good time to get a spoon and start breaking it up a bit. Keep processing.

pb2

The next stage is when the peanut butter is really starting to come together. There will be some areas that look like peanut butter, but it's still really chunky. Stir it up a bit again, and keep processing.

pb3

About another minute or so into the processing, and it's really going to start looking like peanut butter. You're going to look at it, taste it, and cry out with pure joy and consider all the things you could do with this sticky elixer from the gods. But don't stop now. The picture below really looks like peanut butter, but I strongly encourage you to keep processing for about 2 more minutes. If you stop now, the peanut butter may firm up substantially in the fridge (which is where I keep it, just to be safe) making it nearly impossible to spread on that squishy white bread your child so desires. Trust me. Let it go. Stir it up again. Process for about another 2 minutes.

pb4


Finally, your peanut butter should look like this:

pb5

See how it's no longer holding a line? You may think it looks a little runny, but once it is away from the heat of the food processor, it will firm up. It's done now.

Finally, give a taste to your child who has been begging for some peanut butter since you started making it.

pb6

And there you have it. I was told as a child that eating peanut butter alone was one of the most dangerous things you could do since the Heimlich doesn't work on peanut butter. So please don't turn me in to Child Services.

Monday, May 11, 2009

It's really hard *not* to sing a song while I write this...

You know which song I'm talking about... It's about pronunciation. And vegetables. And ditching everything. But it seems so cliche that I'm.Not.Going.To.Do.It.

If you are one of my friends whom I pontificate to about tomatoes, the kinds of tomatoes I have, my collection of tomatoes or why everyone should grow tomatoes, I apologize. I really like tomatoes. I know of no other vegetable (or fruit, if you want to be picky) that comes in so many different shapes, sizes, colors, and flavors, aside perhaps from beans, which aren't nearly as interesting to me. Most people that I know have seen a red tomato. Maybe a yellow one. They are familiar with cherry tomatoes and beefsteaks, but that's about the breadth of their tomato knowledge.

At our last house, my record was 15 varieties of tomatoes crammed into my little garden in one summer. I have in my possession over 45 types of tomatoes. I'm in the process of cataloging all of them, so I'm not sure what my current count is, but I'm pretty sure I'm in the upwards of 60 or so varieties. If you are new to tomatoes, you might be interested in Carolyn Male's book 100 Heirloom Tomatoes for the American Garden, a really interesting look at some of the different variations in tomatoes. My goal is to try all 100 over time.

This year, I have planted:

Paste/plum tomato:

  • Amish Paste
  • San Marzano (these did not germinate at all. Kind of bummed about it)

Cherry-type tomato:

  • Pink Ice - new to me, haven't tried these before, but picked them up at the TBG seed swap
  • White Cherry - I'm hoping these are similar to Snow White- one of Miss Things' old favorites
  • Black Cherry - beautiful black/red color
  • Green Grape - also a new one for me, but I love having cherries in every color.

Regular/Salad tomato:

  • Stupice - a really early tomato, 55 days - can't wait to get those puppies going.
  • Anna Russian - haven't tried this one before, made the 100 heirloom book though.
  • Riesentraube - heavy setter - really looking forward to this one
  • Juanne Flamme - beautiful small orange/red tomato - one of Elise's favorites.
  • Nyagous - black, baseball sized fruit. A new one for me this year.
  • Orange queen - large, orange fruits. This one didn't perform well in columbus, so I'm giving it another shot here.

Mr. H built me a small garden box for the spot in the back of the yard where we do hopefully get enough sun to grow something. Last year's experiment with pots by the driveway was not successful. It is fenced in to keep wildlife like squirrels, deer, racoons and one of our dogs who cleaned out several tomato plants in the last house. I also am borrowing space at a girlfriend's house who is trying gardening for the first time. I figure between the two, I can supply myself with enough fresh veggies for at least the three of us.

The seedlings are doing very well in the sunroom. They probably could be transplanted again before they go into the ground, but I'm not sure I have the room for it.

Friday, May 8, 2009

The cost-benefit of making your own household staples

I read an article on this topic the other day on Slate. Personally, the things the author mentioned in her article I would not consider staples in my house. I mean, we like bagels and all, but it's not the same as not having bread in the house. The same with granola. We like it, but it's not what I would consider a staple.

There are a lot of things that I make at home because I think they are cheaper and/or taste better. Other things, I continue to buy generally because although I think my homemade stuff is better, the time it takes to make them makes it it too prohibative to make them at home. I do think I'm going to try to keep track of the cost of making things at home. Including the time it takes to make them, although my time isn't incredibly expensive right now, other people's might be.


Things currently made at home as a "staple":
  • peanut butter. This is a big one. It is incredibly easy to do, and I'm hooked on it now. Couldn't imagine it any other way.
  • corn chips. Less fat, not fried, damn crunchy, and can control the amount of salt.
  • jam.
  • pickles
  • cookies. Bags of dough ready to go at all times in the freezer.
  • croutons. We eat a lot of salads and soups. In fact, i need to make a batch today.
  • salsa. Made with canned tomatoes, but better than the processed stuff.
  • tomato soup. Again, always kept in the freezer.
  • coffee beans. We are using our roaster heavily, and I think we will be weaned completely off purchased coffee beans except in case of emergency.
  • stock. I am addicted to making chicken stock now. It tastes much better, and not as salty.

Things that I have made, but decided it was not worth the trouble:

  • bread. Just can't keep up with the demand. Fresh bread does not make as good of sandwiches. It goes bad quickly.
  • english muffins. Tasty, but I don't have the process down pat enough to make it worth the effort.
  • Indian food. I know this is kind of broad, and I do make Indian on occasion, but usually it's just a whole lot of prep, and doesn't taste all that much better than our frozen dinners. We stick by our favorite takeout place and our frozen dinners.

Monday, May 4, 2009

White anchovies of love...

I've been gone for a long time. I know that. I feel bad. In fact, several times I have come back to this page, sincerely looked at the posting box, picked out a topic to write about, but then felt so overwhelmingly guilty about the length of time from my last post I left without writing anything. I have a similar relationship with hairdressers and the dentist. Somehow I always feel I'm going to have to do penance for my absence. So when my dear friend poked me about writing again, after I had been tossing around the idea of writing in my head again, I thought I would just plunge right in and do the Hail Marys (or is that Maries?).

I love anchovies. When I was a kid, my family would pile into the car and drive up to Michigan to visit my father's family. My dad was one of six kids. His oldest brother (whom I was named after) was over 20 years older than him (this thought makes my uterus cringe into a little ball). When we would arrive, all the crazy brothers and sisters and their kids would come over to my grandmother's house and they would laugh and talk and be loud and play cards, and drink tea and eat eggs, and, at a very late hour of the evening, order a pizza with everything, including ANCHOVIES. I remember sneaking down to eat a slice of pizza and the anchovies tasted like forbidden salty fruit. And I would then have to run up the scary stairs, past the boarded up butler pantry in the dark because my grandmother didn't believe in anything more than 40 watt bulbs in the house.

I distinctly remember my first white anchovy - it was at a restaurant in Columbus called Spagio on a ceasar salad about 8 years ago. It was nothing like I had ever tried before. They are not salty. They aren't "hairy." The flesh is firm and vinagar-y because they have been preserved in oil and vinegar rather than salt. The color is white. They are beautiful and tasty and I challenge anyone who does not like anchovies to try them at least once (as I did at my friend's house this weekend).


Alas, in this area, they are difficult to find. And they are expensive. Mr. H ordered me two bottles from Parthenon Foods and they are really lovely. I like them better than the last brand I had (don't ask me what they were). Shipping is what really kills you, although it's still cheaper than a two hour drive to a city that does have the little gems.

Monday, October 20, 2008

Living in a war zone....

Today, we completely moved out of our kitchen.

For the next 8 weeks, our existing kitchen will be gutted, re-vamped, a bathroom moved and the bloody awful swooshes that have haunted me for the past year will go away.

On Saturday, we had a Demolition party to celebrate the demise. We gave the kids markers and full permission to write on the floor, on the cabinets, (on each other), along with hammers and one very evil sledgehammer.

After only one handle of rum (god bless the sailors that pre-partied before they came to our house!) the fondly named Beam-Me-Up light was taken down, a countertop was blown away, the pantry was forcibly removed, as was a section of cupboards.

On Sunday we finished the emptying of the kitchen. The dining room has become our new kitchen, complete with the new beautiful cherry hardwood floor that Mr. H finished last week. We have a toaster oven, a portable stove, a microwave and a crockpot. Dishes will be done in the bathroom. The fridge is moving into the entry way hall (which I'm kind of excited about because it means going for a late-night snack is just steps away from our first floor master).

As thrilled as I am that we are getting kitchen redone, walking through the kitchen makes me a little weepy. It's not sealed off yet, so it feels like a war zone. There is no light (since the beam-me-up light is gone), there are holes punched in various areas of the walls, the cupboard doors have all been taken off. Nothing is in it, except for our stove, Lizzie (which is staying).

Although we have lived in three apartments and two houses over the 12 years we have been together, I think this is our first home. This is the first residence we have had to work on. The house feels like us, and I feel like this level of deconstruction mirrors somehow something within myself. I feel like crying every time I walk by it.

Tomorrow, the kitchen will be sealed off and true demolition will begin. We are keeping our fingers crossed that this project will be done by Christmas.

Tuesday, September 9, 2008

I got my arm caught in the freezer, and that's why I haven't written.

Unfortunately, I wish this wasn't true. But I did get my arm caught in the freezer when I was alone in the house. I had about 10 minutes to contemplate whether the spaghetti sauce or the caponata would go best with my arm (as clearly gnawing it off was the only alternative) before I managed to rip it out. Quite painfully, I might add.

Otherwise, things have been busy these last few weeks. The Marvelous Miss Thing is in her third week of first grade. She's exhausted, all the time. She has also started ballet, much to my relief, as I am hoping it will alleviate some of the random pirouettes we've had in the house and school over the past year.

I am in the process of preparing for candy season. As I am officially an LLC now, I am in business. Summer is too hot for candy without a climate controlled area (which mine is not), and who wanted to eat melted chocolate, so I am just starting to ramp up now.

Today, I made chocolate chip cookie dough truffles and some buckeyes to start taking with me to various places. Free candy always intrigues people.

Friday, August 22, 2008

Confession...

I have been living a lie. I have to come clean. It's been bothering me for a month now.

Remember when I wrote about my sauerkraut?

I am ashamed to admit, my fermentation experiment failed.

Five times.

After the first time it failed, I tried again, which was when I wrote the original post. But that batch failed too. And the next. And the next.

What is worse, is that each time I made a new batch, I would make a slightly bigger batch, because I would think to myself "Well, *now* I know what needs to be done. This batch will work." Except that one would die too.

And the pattern was generally the same each time. The cabbage would happily bubble and ferment for about a week and a half. Then, it would stop. Just stop. I would be left with a big vat of slightly sour but mostly salty cabbage. We would leave the vat of it on the counter where I would look at it with the shame of a parent whose child turned out to be a serial killer dog molester.

After we had finally decided that it was, indeed, not ever going to turn into sauerkraut, Mr. H would take it out to the compost bin (which is now about 5 inches of non-fermenting decomposing cabbage). I have gone through approximately 40 pounds of cabbage over these few months. Thank goodness it is cheap.

I have one vat still sitting on my counter awaiting my final time of death. I think I'm giving up on this one for a while. I need to step away.

Turn on the funeral dirge.

Thursday, August 21, 2008

Boat pictures...

I realized the other day that I posted about our cruise, but did not post any pictures of our trip.


Sailing is not for everyone. Sometimes, I even wonder if it is for me (that is generally when we get caught in a storm or it's really windy). However, when you wake up after anchoring in the middle of the lake, and you get to sit out and watch the sun come up over the water - then you realize what a beautiful hobby it can be.

Sunday, August 17, 2008

Back to school sandwiches...

I love back to school time. I love school supplies. I love the (idea of) organizing and re-organizing. More than New Year's, the beginning of school signifies to me a fresh start. A new school year, new teachers, new things to learn, new pens... ahhh... it just rejuvenates me.

Except this is the first year it is totally vicarious. This is my first post-graduation-no-school-in-sight-for-me autumn. Bummer. I keep looking longingly at the school supplies and dorm organizers.

The Marvelous Miss Thing starts school this week. First grade. Big time. Her school does not offer cafeteria services, with the exception of the importing of fast food every day. I'm not real excited about that prospect, and quite honestly Miss Thing isn't a huge fast food fan. She likes a hamburger, but isn't thrilled with pizza and has some sort of recessive gene that makes her not.like.french.fries *gasp*. Clearly, not my good Irish Catholic genes in which we ate potatoes with every meal, and french fries were the top of the potato "yum" chart.

I have been trying to come up with more nutritious yet convenient and portable lunches. The one thing she begged for at the store were those little round pre-cut frozen peanut butter and jelly sandwiches. Well, looking at the price, I figured I could make those puppies at half the cost, plus, by using my homemade peanut butter and jelly, I was cutting down on all that other crap they put in it.

Two squishy white pieces of bread (I let the bread slide. I'm not going to use good bread for this project) cut out with a water chestnut can. Peanut butter on both sides. A spoonful of jelly in the center. (It helps if you kind of squish the bread a little bit)
Seal the two slices of bread with the tines of a fork and pop in the freezer. Puffy white PB&Js. They defrost easily. Heck, Miss Thing eats them frozen.


I felt like a super genius after this little project.